Turning your TV Time into Quality Time
Christine L. Pollock, Editor Ranny Levy, Publisher Ranny's blog
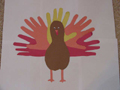 The Thanks Thanksgiving Turkey
Submitted by children's writer, Gregg Golson.
This is an easy and fun project for both kids and their parents to do together.
The turkey is drawn by tracing your feet and hands. The project also leaves enough leeway for a young artist to make their turkey unique.
Supplies needed:
- Scissors
- Glue
- Pen or pencil
- Construction paper (brown or tan, red, orange and white)
Making your Turkey
- Trace both of your feet (with shoes on in brown or tan construction paper.
- Trace your hands:
- Two hands in orange construction paper
- Two hands in red construction paper
- One hand in yellow construction paper
- Cut out the pieces
- Make your turkey’s body (see photo) by stacking the two heel sections of the traced feet and off setting one on top of the other.
Glue the two body parts together.
- Glue the red, orange and yellow hands onto the back of the body to form the turkey’s tail.
- Use some of the scrap orange construction paper. Draw and cut out the two legs and the bill. Glue on the legs and the bill.
- Use a scrap of the red construction paper. Draw a wattle (the weird beard-like part that hangs below the bill), cut it out and glue it on.
- Draw two eyes and fill in the pupils with black circles (see photo).
Cut out the eyes and glue it on.
Now put your name on the turkey’s belly and the date you made your turkey on the back. Think about some things you are thankful for and write then on each large section of tail feathers.
On Thanksgiving Day you can read to your family the things you are thankful for before you eat your turkey dinner
 Pressed Colorful Leaves
Complements the KIDS FIRST! title, "First Impressions: Seasons"
Materials: leaves, plastic knife, old crayon pieces, wax paper, dishtowel
1. Collect some pretty leaves.
2. Place leaves on sheet of wax paper.
3. Scrape crayon shavings over leaves.
4. Place wax paper on top of leaves.
5. Place towel on top.
6. With iron on lowest setting, iron over the wax paper until the crayon wax melts and leaves are sealed between the sheets of wax paper.
Optional activity: Look up information on your leaf and attach it to the wax paper and keep in a "leaf journal."
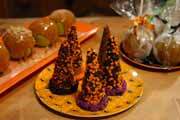
Complements the KIDS FIRST! Festival title, "Casper Meets Wendy: Family Fun Edition."
Idea from: Cathie Filian and Steve Piacenza, hosts of DIY Network’s new Halloween-themed series "Witch Crafts."
Ingredients:
3-4 oz. of chocolate (dark, or milk, or semi-sweet chocolate chips)
12 sugar cones
store-bought frosting tube
frosting tube tips
chocolate wafer cookies
jimmies, nonpareils and/or sprinkles
candy corn (optional)
mint chocolate chip ice cream (optional)
Preparation:
1. Melt the chocolate in a double boiler or in the microwave on low, stirring every 30 seconds until melted.
2.
Spoon chocolate over the cone, covering it entirely or only partially.
3.
Spoon jimmies, sprinkles, or nonpareils on the hot chocolate.
4.
Fill the cone with candy corn, if desired.
5.
Invert on a chocolate wafer. Using the star-shaped frosting tip, pipe frosting around the base of the cone, sealing it to the wafer.
6.
The cone can be put on a scoop of mint chocolate chip ice cream to make a witch's head.
 Paw Print Path.
Complements the KIDS FIRST! title, Clifford's Puppy Days: The Perfect Pet
Materials: cereal boxes or other cardboard, scissors, pencil
1. Draw two "paws" and cut them out.
2. Put one paw on the floor and stand on it.
3. Place the other paw down a little distance away.
4. Hop onto the next paw and pick up the first then repeat steps 3 and 4 until you reach yuur destination.
5. Game can become a race with each child having two paws.
Need: paper, pen/pencil, and washable markers
Directions: Have children put colored marker on their finger then make thumbprints on the paper. Pink thumbprints turn into pigs. Use black marker for cows, red for roosters etc. Use a pern/pencil to add legs, beaks etc.
Heart Elephant (With Squirting Trunk)
Supplies: craft foam, scissors, glue, crayons, hole puncher, medicine dropper
1. Cut three large hearts and two small hearts.
2. Invert two large hearts.
3.
Glue one large heart on top of the other halfway so it looks like elephant has four legs.
4. Glue third large heart right-side-up over top of other hearts to make face.
5. Glue smaller hearts sideways on each side of head for ears.
6. Punch hole where trunk goes.
7. Insert
dropper from back to front..
8. Draw eyes.
Four Square - A Fun Game for Adults and Kids
Equipment: Heavy-duty rubber playground ball, driveway or concrete space for a 10-ft. square, chalk
Play: Draw off a 10-ft. square with the chalk, then divide into 4 even squares. Number them 1-4, going clockwise. Draw a diagonal line in 1's box, to be the serving spot. 1 serves by bouncing the ball into any of the three boxes, trying to prevent that player from bouncing it back in his box. If the player returns the ball, he stays, and the 1 player is out. If not, that player is out. The next player moves into the 4 box, and the players move up. The object of the game is to move up to the 1 box, and stay there.
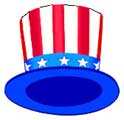
Ingredients: vanilla ice cream; wafer ice cream cone; red frosting; white frosting; blue frosting; whipped cream; red and blue candies
1. Put one scoop of ice cream on a plate.
2. Put cone upside down on top of ice cream.
3. Put blue candies on for eyes.
4. Put red candy on for nose.
5. Use whipped cream to make a beard
6. Use blue frosting to make a bar around the base of the hat.
7. Use red frosting to paint vertical stripes down cone from top to blue.
8. Finish off by painting white stars around the blue base of hat with white icing.
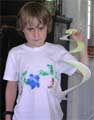 Paper Spiral Snake Craft for Kids
Materials: Paper plate, pencil, crayons, scissors
1. Color both sides of the plate.
2. Starting from the outside, cut a spiral towards the middle. The outside will be the head.
3. (optional) Cut a small arrow out of red construction paper and paste on for a tongue.
Mouse Pad for Dad . Idea from DIY Network Expert Cat Wei, host of “Material Girls.”
Is Dad constantly working? Make him a cool mousepad for his computer by blowing up your favorite family picture and laminating it. Then make him laugh by using dry erase pens to give him or your little brother a moustache. Or make a larger version as a dry erase board for phone messages or notes.
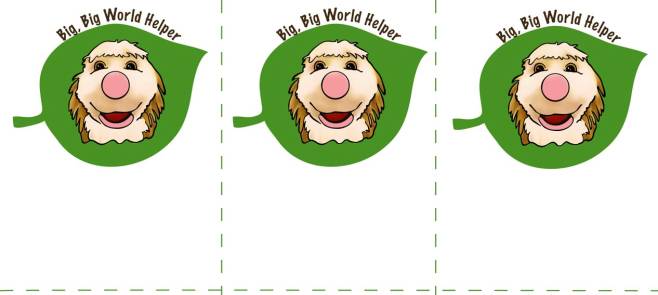
Activity - Be a “Big, Big World Helper.” Complements the KIDS FIRST! Film Festival title, "It's a Big, Big World:The Earth Needs You."
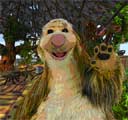 Hey, I’m so glad you’re here! Can you look for ways to be a “Big, Big World Helper” with me? It might sound like a big job, but there are lots of little things you can do every day to help the world around you. Let’s get started!
First, read the checklist and decide which things you would like to investigate – you can pick just a few things to start! Then, print out the Snook “Big, Big World Helper” pictures. Make sure you have one Snook cutout for each item you are going to investigate. If you need more, you can photocopy or trace extras.
Start with the first item you have chosen, such as “Turn off the lights when you leave a room.” Look in a few different rooms. Are any lights on that don’t need to be? If so, turn them off. Then use a piece of tape or string to hang a “Big, Big World Helper” Snook cutout to remind you to always turn the lights off when no one is using them. Before you hang it up, you can write or draw a picture on it to help you remember what you should do to help the earth.
Now, investigate as many other items as you’d like. When you have finished, talk about what you learned what you’re going to do differently in the future. Then think of other ways you can work on protecting the earth. For example, decorate a box to collect paper that everyone can reuse. Or have a family meeting and tell everyone about your “Big, Big World Helper” reminders so they can follow them too!
“Big, Big World Helper” Checklist
- Put litter where it belongs – in a trash can or a recycle bin!
- Don’t throw trash on the ground. Trash lying around where it doesn’t belong can hurt plants, animals and people.
- Recycle newspapers, paper, glass, cans, and plastics by placing them in special containers.
- Reduce trash by finding ways to use things that would normally be thrown away.
- Watch the water!
- Run water only to wet and rinse your hands. Turn of water while you scrub!
- Don’t let the water run while you brush your teeth.
- Stop the drips! Make sure you turn the water all the way off when you’re finished.
- Save energy!
- Always turn off the lights when leaving a room if no one else is using them.
- Decide what you want to get before you open the refrigerator door. Keeping the door closed helps the cold air stay inside and use less electricity.
- When you’re finished watching TV, listening to the radio, or playing on the computer, make sure they are turned off.
- Make a difference outside!
- Be in charge for caring for a plant (inside or out!).
- Put a bird feeder or a birdhouse outside.
- Walk on sidewalks and paths so you do not step on growing plants.
- Going out?
- Make sure the door is closed behind you. Heat or air conditioning will leak out through an open door.
- When you go shopping, bring reusable bags for your groceries or other items. Or be in charge of saving plastic bags in a special spot and reusing them the next time you shop.
 Activity
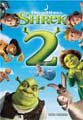
- Paper Gingerbread Men. Complements the KIDS FIRST!Film festival title, Shrek 2
Activity
- Paper Gingerbread Men. Complements the KIDS FIRST!Film festival title, Shrek 2
1.Cut the bottom off a paper bag and slit up one size. This will give you a very long piece of brown paper (you could use a regular piece of paper, but your chain won't be as long).
2.
Remember that the key to making connected gingerbread men is to always fold in the same direction and leave part of the main fold uncut.
3.
Begin by folding the paper in half. Then fold it in half again, making sure that you make the fold on the same side as the first fold.
4.
Continue folding in this manner until the paper is the size you desire, usually at least 4 inches wide.
5.
Draw your gingerbread man shape on the paper. Make sure that parts of the gingerbread man will be right against the fold.
6. Cut the outside of the gingerbread man first. Next cut parts of the gingerbread man out on the folded side.
7. Do not cut all parts of the gingerbread man out on the folded side. People often leave the hands and feet against the fold.
8. Open the paper, and you will have a string of gingerbread man connected by the hands and feet.
 Spring Hat
Materials: A paper plate, colored construction paper, crayons, scissors, glue
1. Color paper plate green like grass.
2. Fold the plate in half and cut a slit from the center of the folded side to an inch away from the outside edge.
3.
Cut two more slits like pie wedges, ending each slit one inch from the outside edge.
4. Bend the triangles formed by the cuts upwards.
5. Cut out some construction paper flowers--any shape is fine.
6. Glue flowers to top of triangles.
Natural Eggs - A Ranny recommendation. Perfect for Easter or spring baskets
Materials: Eggs,
water, vinegar, natural dyes (see descriptions)
1. Wash eggs in mild soap and warm water to remove any 'sealer' or residue.
Longer boiling or soaking will make the color deeper.
2. Add a teaspoon of vinegar at the same time you add the egg to set the dye.
3. Soak eggs in colors as desired.
4. To make a batik like pattern on them, collect some small leaves, like clover,
or even grass or small leaves from trees. Wet them a bit to make them stick
to the surface of the egg then wrap the egg with the leaf on it in some cheese
cloth , dip in dye and la voila, when you take it out, you've got the pattern
of the leaf on the egg. Just like a batik.
For natural dye colors:
Light green - Save the water from canned or fresh cooked spinach and boil eggs
in it, or pick a few dandelion leaves to boil them in.
Pale Yellow - Add carrot tops, celery seed or orange peel to water for boiling
eggs.
Deep Yellow - Put ground turmeric in the water with boiling eggs, or use yellow
onion skins.
Orange - Yellow onion skins, at least two cups full. Boil them for a half hour,
then add eggs and boil until the eggs are done.Tan - Coffee or tea.
Blue - Red cabbage leaves. Boil leaves in water, then use the cool liquid to
dye boiled eggs. Or let the eggs set in juice drained from canned blueberries.
Pink - Use the liquid from canned or pickled beets, or boil along with a fresh
beet, or chopped rhubarb stalks, red onion skins.
Lavender - Purple grape juice.
Red - Red onion skins (this takes quite a few and you have to soak the eggs
in it for a half hour or so after boiling).
Bright Yellow - Inner bark of apple tree bark. Scrape the bark into a pot of
water and boil for a half hour or so. Don't use vinegar in this, but add a half
teaspoon of alum to each quart when cool, to bring out the color.
 Craft
- Dancing Caterpillar Puppet. Complements the KIDS FIRST! title, Kiddie Village: Fun
With Dance.
Craft
- Dancing Caterpillar Puppet. Complements the KIDS FIRST! title, Kiddie Village: Fun
With Dance.
Materials: construction paper; scissors; tape or glue sticks or hot glue gun
with glue; markers or crayons; popsicle sticks
1. Cut out 13 strips of paper that are 1 inch by 6 inches, and one that is
4 inches square.
2. Form one of the strips into a circle and secure it with glue or tape or hot
glue.
3. Form the next paper strip into a circle connected to the first loop.
4. Continue until all 13 circles are connected, making a chain. Each loop is
a segment of your caterpillar.
5. Cut a circle from the paper square to make a head for the caterpillar. Using
a marker or crayons, add some simple eyes. Glue on two tiny triangular jaws
(mandibles).
6. Glue the head to the caterpillar.
7. Hot glue popsicle sticks on parts of the caterpillar so child can manipulate
movement by holding the sticks.
 Activity
- Chanting
Song and Movement - a favorite activity of Angela Santomero, creator of Blue's Clues. Complements the KIDS FIRST! title, Move
N' Groove Kids, Vol. 1.
Activity
- Chanting
Song and Movement - a favorite activity of Angela Santomero, creator of Blue's Clues. Complements the KIDS FIRST! title, Move
N' Groove Kids, Vol. 1.
1. Make up a chant with words like, "What shapes can you find? Can you
find a triangle?" (or what color)
2. Have the childgo around the room pointing out the shapes (or colors).
 Activity
- Banana Magic. Complements the KIDS FIRST! title, Families
of Puerto Rico
Activity
- Banana Magic. Complements the KIDS FIRST! title, Families
of Puerto Rico
Materials: banana, needle or toothpick
1. Stick a toothpick into a banana somewhere along a seam. Rotate the toothpick
left and right inside the banana, cutting all the way through the fruit, but
not through the peel. Try to keep the hole the toothpick makes as small as possible.
2. Take the toothpick out and repeat at another spot on the banana. Keep making
internal slices until you have at least five or six.
3. Now offer the banana to an unsuspecting friend (maybe even telling them some
odd story about mutant bananas from Ecuador). When your friend peels the banana,
they will be VERY surprised to find that it is already sliced!
 Craft
- Paper Plate Owl.
Craft
- Paper Plate Owl.
Materials: Paper plate, 2 buttons for eyes (or circles of construction paper),
scissors, stapler or tape, brown construction paper
1. Cut three small triangles out of brown construction paper.
2. Cut two feet out of brown construction paper.
3. Cut on inner circle part of paper plate, leaving about an inch at top and
bottom.
4. Fold outer part of plate into middle and staple. Leave inner part out for
wings as pictured above.
5. Cut fringes on wings to look like feathers.
6. Glue or staple on eyes, beak, ears and feet.
 Craft
- Racism and M&Ms. This activity complements the main article in this magazine,
Craft
- Racism and M&Ms. This activity complements the main article in this magazine,
1. Put out a bowl of M&Ms, and ask the children to take their favorite
M&M out of the bowl.
2. Ask them why they chose that color.
3. Ask them which is their least favorite and why?
4. Put a blindfold on the child or have them shut their eyes.
5. Give them different colored M&Ms to eat and ask them to identify which
one was their favorite.
6. After the children have all tried this, take off the blindfolds and relate
the lesson to humans.
7. Emphasize that we might be different colors on the outside, but we are all
equal on the inside.
 Greetings - Developed by Elders Share the
Arts (New York City). Complements the KIDS FIRST! title, My
Grandbaby & Me.
Greetings - Developed by Elders Share the
Arts (New York City). Complements the KIDS FIRST! title, My
Grandbaby & Me.
1. Form intergenerational pairs. Have each person stand back-to-back, a few
feet apart from one another.
2. Call out different emotions (e.g., overjoyed, scared, curious), each time
suggesting different greetings. When the direction is given, have the pairs
of individuals turn and greet one another. Examples: Two old friends who meet
suddenly after a long separation and are overjoyed to see each other. Other
examples include an angry meeting, aloof, afraid, sad, or humorous greetings.
One person may be aloof, the other angry, etc. Each small scene begins with
the participants back-to-back, turning to one another for the greeting, and
then, when each meeting is over, turning back around.
3. End the exercise by having the people greet each other as they really are
in the present.
With frailer group members, this exercise can be done as though the two greeters are on the telephone. The greeting can be varied by having greeters sing it, sign it, or mirror each other’s movements.
To extend the activity and its educational value, present participants with the following homework idea: “Observe how people greet each other at school, on the bus, in a restaurant, and in other settings. Look at body language, rhythms, voice, and gestures. In what ways do young people and older adults use different greetings? In what ways do young people and older adults use similar greetings?”
Craft - Edible Sheep. I did this simple snack
idea in my Head Start home daycare a few years ago when we were learning nursery
rhymes. This went along with our Little Bo Peep rhyme and the kids loved
it!
Materials: cottage cheese, raisins, pretzel sticks, grapes or cherry tomatoes
or cherries.
1. Put an oval cottage cheese on a plate for the sheep's body with a circle
of cottage cheese on the top right or left for a head..
2. Add four pretzel sticks for legs.
3. Cut the grapes or cherries in half and add one half as a mouth..
4. Use a raisin for the eyes.
Snowman Pin - Idea from children's book author, Linda Stanek, who invites librarians, teachers, parents, and students, to participate in the Becoming a Book project. More details.
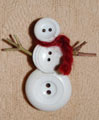 Complements
the KIDS FIRST! title Choose
your Own Adventure: The Abominable Snowman
Complements
the KIDS FIRST! title Choose
your Own Adventure: The Abominable Snowman
Materials: 3 white, two-holed buttons, small, medium and large; small piece of cardboard; black permanent marker; 2 tiny sticks; glue; scrap of yarn, approximately 3 inches long; 1 pin back
1. Lay buttons on cardboard so that they overlap slightly, forming a “snowman.”
2. Trace around the buttons and set them aside.
3. Cut out the cardboard “snowman” slightly smaller than the tracing,
and color black, using a marker.
4. Glue the buttons on, beginning with the bottom button, and overlapping each
next button slightly. Position the bottom 2 buttons so shier holes vertical,
forming the snowman's buttons. Position the top button so the holes are horizontal,
forming eyes.
5. Glue two tiny sticks behind the middle button to form arms.
6. Tie yarn between the medium and small buttons for a scarf.
7. Stick a pin back to the back of the snowman.
Friendship
Mats - Placemats with a Twist
Materials: Construction paper, markers/crayons, laminating paper (or access
to lamination), scissors
1. This is a great gift idea and party idea. Choose someone (not yourself)
who you want to make a placemat for.
2. Draw a picture of the person on some construction paper.
3. Draw pictures of some things you appreciate about this person (a smile if
they make you laugh, a chef's hat if they cook). Write down words that make
you think that this person (sweet, a great skateboarder). You could also cut
out pictures from magazines and glue them on if desired.
4. Write the person's name on the placemat then sign your own as the artist.
5. Laminate the placemat so they can use it over and over.
Placing People
Idea from reader, Julia Gabor. This is the great activity for naming
heroes and defining how we perceive them. Gabor recommends Start
Something, a free program for youth 8-17, that addresses three national
priorities: character education, volunteer services and career exploration.
Through September, 2007, Start Something participants can apply for individual
grants of up to $5,000 to assist in pursuing their dreams.
Materials: 4 posters
1. Draw 4 posters, one having the word ROLE MODEL, then one with LEADER, then
one with MENTOR, and lastly BIG KAHUNA.
2. Hang the posters on 4 different walls in the room.
3. Gather the group in the center of the room.
4. Using the list below ask the students to choose who they think is what type
of leader and walk toward that corner. Ex. Say- "Oprah Winfrey."
5. Give the students 30 seconds to find their way and settle into a corner with
a poster.
6. Have the students notice the difference in each others answers. Remind them
that they may have opinions that are different than others in the group, that's
OK.
7. Continue activity by repeated the instructions above. Once you have completed
the list- ask them if they would like to add any one to the list.
List for posters (or make up your own):
Oprah Winfrey, Parents, Sports Coaches. Volunteers/Tutors, Firefighters, Mother
Teresa, Michael Jordan, A grandparent, A famous actor, Abraham Lincoln, Benjamin
Franklin, Martin Luther King, Someone in your community that does good things,
Rosa Parks, Mia Hamm, Caesar Chavez, Martha Graham, Shirley Temple, A best friend,
Wonder Woman, Saints, Any president in the USA
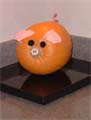 Fall
Fun- Craft a Pumpkin Piggy!
Fall
Fun- Craft a Pumpkin Piggy!
Idea from children's book author, Linda Stanek, who invites librarians,
teachers, parents, and students, to participate in the Becoming a Book project. More details.
Materials: Small pumpkin; thin, permanent marker; glue; black and pink felt; pink pipe cleaner.
1. Choose a pumpkin with a snout-like stem. Lay it on its side.
2. Using a permanent marker, make two vertical lines on the “snout.”
|
3. Cut two small circles of black felt for eyes. Glue in place.
4. Cut two pink ears from felt. Glue, wrinkling the curved edge.
5. Twist a 4” piece of pink pipe cleaner around a pencil. Glue it to the
back of your pumpkin pig!
Colored Worms - Great
Play Dough Recipe
 Project
idea is from the eight-year-old animator, Peter
Gundling (pictured with Steven Spielberg).
Project
idea is from the eight-year-old animator, Peter
Gundling (pictured with Steven Spielberg).
Materials: 2 c. flour, 2 tablespoons oil, 4 teaspoons cream of tartar, 2 c, water, 1 c. salt, food coloring
1. Mix all ingredients together (gradually to avoid lumps).
2. Cook over medium heat until it boils or forms a wall (2-3 minutes).
3. Knead until smooth. Color. Store covered.
4. Make shapes with the play dough. Roll into lines, which can be worms.
5. Take pictures of the worms, slightly moving the worms between shots. Flip
through the picture printouts quickly to see the worms "move."
Characters in Costume
 complements Heroic Girlz. Project idea is from
the Heroic Girlz website.
complements Heroic Girlz. Project idea is from
the Heroic Girlz website.
Materials: large rolls of paper, paintbrushes, paints, pencil, material (optional)
1. Have children choose a character from history to "bring to life."
2. Help children make full-sized tracings of each other on long white paper.
3. Within the outline of the body, paint the image of their character.
4. Cut out and back if desired.
Sun Paper Plate Craft
 complements Astronomy for K-8.
Materials: paper plates, yellow construction paper, scissors, pencil, glue, crayons, googly eyes (optional)
1. Trace you child's hands on the yellow construction paper and cut out. Make
enough hands to wrap around the paper plate.
2. Glue the palm of the hand onto the paper plate, with the fingers reaching
out like the sun's rays.
3. Color a face on the sun, using googly eyes if desired.
Make A Puzzle
 complements Mister Rogers: Going
to School.
complements Mister Rogers: Going
to School.
Materials: ruler, paper, pen, pencil
1. Take your paper and draw lines with a ruler vertically.
2. Take your paper and draw lines with a ruler horizontally to make a grid.
3. Choose words from your favorite movies or other topic and write them down
as a list.
4. Write these words vertically and horizontally and diagonally, backwards and
forwards at various points of the grid.
5. Fill in the other spaces with random letters.
6. Bring the puzzle to a friend to enjoy as a word search.
Bug Picnic
 complements The Very Hungry Caterpillar
Activity - Bug Picnic
Materials: an old white pillowcase wound or similar material, peanut butter, jelly, bread crumbs, magnifying glass, books on bugs
1. Spread peanut butter, jelly and bread crumbs on the white fabric.
2. Leave outside overnight in an area you don't mind bugs coming to.
3. The next day, see how many different kinds of bugs have shown up on your
fabric.
4. You can use your magnifying glass to observe the bugs.
5. Use insect books to identify the bugs.
6. Draw the bugs you have observed.
Kazoo
 complements Let's
Play Music
complements Let's
Play Music
Materials: Cardboard Paper Towel or Toilet Paper Roll , Wax Paper, Rubber Band, Pencil
1. Poke 3 or 4 holes in the cardboard roll about 1 inch apart.
2. Cut a 4 inch square of wax paper.
3. Decorate the cardboard roll if you want.
4. Secure the wax paper over one end of the cardboard roll using the rubber
band.
Enjoy playing some great music!
My First Film
 complements DVD Home Moviemaking:
A Beginners Guide
complements DVD Home Moviemaking:
A Beginners Guide
Materials: 3x5 cards, pencil with eraser
According to Wikipedia, a flip book is a book with a series of pictures that vary gradually from one page to the next, so that when the pages are turned rapidly, the pictures appear to animate by simulating motion or some other change. Flip books are often illustrated books for children, but may also be geared towards adults and employ a series of photographs rather than drawings. Flip books are not always separate books, but may appear as an added feature in ordinary books or magazines, often in the page corners. Software packages and websites are also available that convert digital video files into custom-made flip books.
A terrific website that details how to make your own is http://home.att.net/~RTRUSCIO/FLIPBOOK.htm.
Patriotic Strawberries
 complements Under the Stars and
Stripes
complements Under the Stars and
Stripes
Materials: Strawberries, white chocolate or almond bark, blue sprinkles
1. Pour blue sprinkles into a small bowl for dipping.
2. Wash strawberries and take out green part if desired (not necessary).
3. Melt some white chocolate or almond bark over medium heat, stirring constantly.
4. Remove pan from heat and carefully dip strawberries halfway into melted mixture.
5. Dip immediately into sparkles until they cover half of the white on the strawberries.
6. Lay on plate to dry.
7. If chocolate gets to hard to dip, re-heat.
**Heating can also be done in microwave.
Daddy and Me Portrait with Colors
 complements Rembrandt:
Fathers and Sons and the book I
Feel Orange Today
complements Rembrandt:
Fathers and Sons and the book I
Feel Orange Today
Materials: paints, paper
Rembrandt was known for his use of shading and the rich colors he painted with. The colors evoke certain moods. When we are sad, we might say that we feel blue. We tend think of happy things when we see yellows, like the sun.
1. Have your child think of what color they associate with their father. Show
many different shades and talk about how they make the child feel. Ask the child
why they associate certain colors with their father.
2. Have the child do the same thing with the colors the associate with themselves.
3. Let the child paint a picture of the themself and their dad.
4. Write a sentence or two on the bottom of the page explaining why the child
chose those colors.
Valkyrie/Viking Fun
complements The
World's Very Best Opera for Kids
 Materials:
large square of newspaper, aluminum foil, cardboard
Materials:
large square of newspaper, aluminum foil, cardboard
According to Wikipedia, "In Norse mythology the valkyries are dísir, minor female deities, who serve Odin. The valkyries' purpose was to choose the most heroic of those who had died in battle and to carry them off to Valhalla where they became einherjar. This was necessary because Odin needed warriors to fight at his side at the preordained battle at the end of the world, Ragnarök...Richard Wagner incorporated Norse tales that included the valkyrie Brünnhilde (Brynhildr) and her punishment and subsequent love for the warrior Siegfried (Sigurðr) into his operas Die Walküre and Götterdämmerung. These depictions have subsequently lead to modern representations of valkyries less as gore-spattered, shrieking and wolf-riding figures in a battle's sky but more commonly as romanticised, pristine white and gold clad figures riding winged horses."
A fun craft for children's imaginative play is making a Viking hat. This can be done through origami. Great detailed instructions can be found here. Just replace large paper/newspaper for origami to make a hat that is wearable. Swords can be made with cardboard and covered with aluminum foil to create a metallic look.
Mother' Day Hug
complements Make
Baby Laugh: Chuckle Together
![]() Materials: large paper, scissors,
crayons or markers
Materials: large paper, scissors,
crayons or markers
1. Have child lie down on paper with arms outstreteched.
2. Trace areound the arms and fingers.
3. Draw a large hear between the arms after child stands up.
4. Cut out arms with heart in between.
5. Color in the heart and add message.
Candy Train
complements I
Love Toy Trains, the Music
 Materials:
Hot glue gun, a roll of hard candy (like Lifesavers), 4 wrapped peppermint candies,
two wrapped caramels, a wrapped chocolate kiss, a short length of yarn or string
(optional)
Materials:
Hot glue gun, a roll of hard candy (like Lifesavers), 4 wrapped peppermint candies,
two wrapped caramels, a wrapped chocolate kiss, a short length of yarn or string
(optional)
1. Glue four peppermint candies (still in wrappers) to the roll of candy for
wheels.
2. Glue a wrapped caramel to the top of the rolled candy above back set of wheels
(place where engineer sits). Glue the other caramel on top of that.
3. Glue wrapped chocolate kiss over front set of wheels on top of the rolled
candy (steam).
Tie-dyed Easter Eggs
complements Easter
Carol
 Materials:
Boiled eggs, water, colored tissue paper
Materials:
Boiled eggs, water, colored tissue paper
1. Boil eggs for 12 minutes then let cool.
2. Cut colored tissue paper into small shapes.
3. Put a bowl of water in front of the child.
4. Have the child select some of the colors they want to use.
5. Dip the papers into the water and place over the egg. The colors can overlap
each other.
6. When the egg is totally covered, put in a safe place to dry (like a refrigerator)
for a day or two. (An egg carton works well--especially the cardboard ones.)
7. When the paper is totally dry, peel all the paper off the egg and enjoy the
beauty.
***Optional: You can do this with blown eggs very carefully. I have done it
with groups of 3 and 4 year olds without problems. I prepare the eggs so the
children don't get any raw egg in their mouths.
To blow an egg: Insert a needle into one end and make a small hole. Do the same
on the other end. Lean over a bowl and blow out the egg's contents. If it's
too hard to blow, make a larger hole.
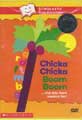
Tasty Alphabet Snack
based on Chicka
Chicka Boom Boom
 Ingredients:
1 1/4 cup flour
1 tsp. baking powder
1/2 tsp. salt
2 Tbs. vegetable oil
1/2 cup milk
1 beaten egg
cinnamon (optional), oats (optional), sesame seed (optional), or shredded cheese
(optional)
1. Mix all ingredients EXCEPT egg and toppings.
2. Place on lightly floured surfaced and knead for one minute.
3. Put a bowl over the dough and let it rest for 15 minutes.
4. Preheat oven to 450°.
5. Roll our dough into letter shapes and place on ungreased cookie sheet.
6. Brush egg over top and sprinkle with favorite topping.
7. Bake 9-11 minutes or until light golden brown.
Pipe Cleaner and Wire Animals
based on Animal
Groove
idea from artist Christopher Pollock
**Great for car trips, without the paper
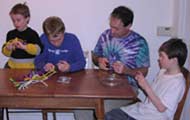 Materials:
Paper, pencil, pipe cleaners or small needlenose pliers and a roll of 20 gauge
wire. (The artist used 16 gauge, but recommends a higher gauge for younger children).
Materials:
Paper, pencil, pipe cleaners or small needlenose pliers and a roll of 20 gauge
wire. (The artist used 16 gauge, but recommends a higher gauge for younger children).
1. Choose an animal you would like to make. Encourage young children to choose
simple animals like a fish or snake.
2. Draw the animal on paper. Try to do it without lifting up the pencil.
3. Place the pipe cleaner on top of the drawing and bend to match the shape.
4. As they become used to the concept, ask the child to "draw" the
image in their mind then bend the pipe cleaner to make the image.
5. When children are comfortable with the pipe cleaners, cut a piece of wire
and hand them some small needlenose pliers. Let them practice pinching and bending
on a shorter piece of wire.
6. Have the children make their animal shapes with the wire and pliers.
7. As they become more adept with the wire and pliers, have them make it more
3-D by having arms and legs and ears bend out.
A Global Celebration
Complements Zoe's
Dance Moves
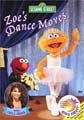 Materials:
a globe, paper, colored pencils, web site or book about flags
of the world
Materials:
a globe, paper, colored pencils, web site or book about flags
of the world
1. Watch Zoe's Dance Moves or another title with dances from around the world.
2. Pick your favorite dance and find out what country it is from. Look that
country up on the globe.
3. Look up that country in a book or on the web site listed above to find out
what their flag looks like.
4. Copy the flag onto paper.
5. Talk about the country and its geographic location and how that might affect
the dance and clothing styles.
Dog Observation Notebook
Complements All By
Myself: Taking Care of My Pet. Vol. 2
 Materials:
computer paper, crayons, hole puncher, ribbon, pencil, thin cardboard (like
a cereal box)
Materials:
computer paper, crayons, hole puncher, ribbon, pencil, thin cardboard (like
a cereal box)
1. Draw the outline of a dog about seven inches across on computer paper and
cut it out.
2. Using that dog as a template, trace around it with pencil on another sheet
of computer paper and cut out.
3. Continue doing this until you have five to ten dogs.
4. Trace two more dogs on the thin cardboard and cut out. Color the dog.
5. Punch a hole through the cardboard and the papers near the dog's ear.
6. Thread a ribbon through the hole and tie (then you can untie the bow to add
papers later as the pages fill up).
7. (optional) tie ribbon around a pencil and tie the other end of the ribbon
thought the punched hole. Please make sure the ribbon is not long enough to
be a choking Hazard.
8. Go out and observe some animals through words and pictures.
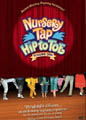
Paper Dolls Dance Hip to Toe
Complements Nursery
Tap Hip to Toe
 Materials:
construction paper, scissors, magnet strips (a roll can be found in the craft/sewing
section of Wal-Mart), crayons or markers, a brass paper fastener
Materials:
construction paper, scissors, magnet strips (a roll can be found in the craft/sewing
section of Wal-Mart), crayons or markers, a brass paper fastener
1. Draw the outline of a boy or girl and cut it out. The arms and legs should
be cut so they are separate
2. Fasten the arms and legs to the body with brass paper fasteners so they can
move.
3. Stick magnet strips on the torso, feet and upper legs.
4. Design pants, shirts, shoes, skirts and leggings out of construction paper
that go along with your favorite stories and rhymes (ex: overalls for Little
Boy Blue).
5. Add some magnet strips to the torso part of each outfit, the shoes, and the
upper leg part of pants (note: if you make pants, make sure you cut the pants
in half so each leg is movable). Dress your doll.
6. Draw a face on the doll and add construction paper hair if you want.
7. Make several dolls and let them dance out the rhymes.
8. If you want to copy Hip to Toe, place your doll behind a curtain with only
its legs showing and have it dance to music or in rhythm to a poem you are reading.
Snowman Snack
Complements Stranger
in the Woods
 Materials:
bread or crackers, knife, peanut butter, marshmallow fluff (found in grocery
store near jelly and peanut butter), various pieces of fruit and vegetables
(we used raisins, carrots, apples and a banana).
Materials:
bread or crackers, knife, peanut butter, marshmallow fluff (found in grocery
store near jelly and peanut butter), various pieces of fruit and vegetables
(we used raisins, carrots, apples and a banana).
1. Cut bread into circles with a blunt knife (I save the scraps to add to meat
loaf or to use in French toast).
2. Spread peanut butter on bread.
3. Spread marshmallow over the peanut butter.
4. Use raisins for eyes and buttons.
5. Use a peeled carrot piece for the nose and arms and legs.
6. Cut a tiny banana piece for the hat.
7. Use apple pieces for the ears.
8. Be creative, use the different fruits and vegetables to make whatever faces
you want.
Quinzie
Complements AdventurePatrol:
Snow Daze
 Materials:
snow and shovels.
Materials:
snow and shovels.
1. Pile up a large amount of snow.
2. Dig a hole in the center of it.
3. Make sure the walls and roof are thick enough to not cave in.
4. Go inside, out of the wind and discover how cozy the snow can be.
Lion Mask
Complements Wai Lana's
Little Yogis, Vol. 1
 Materials:
paper plate, old newspaper, string, scissors, crayons or markers.
Materials:
paper plate, old newspaper, string, scissors, crayons or markers.
1. Cut newspapers into strips about 1/2 inch wide. Put aside.
2. Take the paper plate and draw circles where your eyes and mouth will go.
3. Draw a lion's nose and some whiskers.
4. Color the rest of the face.
5. Put a hole on each side of the face and tied string to each hole.
6. Glue the newspaper strips around the outside of the plate on the top and
sides to make a mane.
7. Tie the strings at the back of the child's head so mask is secure.
8. Have a roaring good time!
3-D Raven Picture
Complements Raven
Tales: Raven Steals the Sun
Story at http://www.raventales.ca/
 Materials:
large piece of construction paper, glue, scissors, crayons, leaves, heavy book
for pressing, wax paper for pressing.
Materials:
large piece of construction paper, glue, scissors, crayons, leaves, heavy book
for pressing, wax paper for pressing.
1. Collect beautiful leaves and some grass.
2. Dry out the leaves and grass.
3. Open a heavy book and put wax paper on each side.
4. Put leaves and grass between pieces of wax paper then shut book.
5. Leave for a day or two.
6. Print picture of a raven (link
to coloring page).
7. Color raven and cut out.
8. Glue onto a large piece of construction paper.
9. Draw trees on paper.
10. Tape pressed leaves and grass onto trees and below bird.
Car Trip Chain
Complements Berenstain
Bears Take a Car Trip
 Materials:
construction paper, tape, crayons or colored pencils, map.
Materials:
construction paper, tape, crayons or colored pencils, map.
1. Cut the construction paper into even strips.
2. Take out a map and plan your traveling route.
3. Write different cities and landmarks on each strip in the order they will
appear on the trip.
4. Color the strips around the word
5. Take the first strip and make a circle so the ends meet together.
6. Tape the ends together.
7. Take the second strip and put it in the middle of the first circle.
8. Join both ends above the first circle, making a new circle.
9. Tape those ends together, making links in a chain.
10. Put the third strip in the middle of the second circle and repeat above
steps.
11. When traveling, tear off each link when you pass the landmark labeled on
it.
Homemade Hamtaro
Complements Hamtaro:
Ham-Hams Head Seaward
 Materials:
cardboard or cereal box; yarn; pipe cleaner; scissors
Materials:
cardboard or cereal box; yarn; pipe cleaner; scissors
1. Fold thin cardboard in half and draw a large circle.
2. Draw a smaller circle inside it so it looks like a doughnut.
3. Cut a long piece of yarn.
4. Tape one end of the yarn onto the cardboard.
5. "Sew" the yarn up through the center and around the outside then
back up the center.
6. Continue doing this until the entire "doughnut" is covered with
yarn.
7. Carefully start cutting the yarn around the outside edge. Do this right over
a flat surface and don't let the yarn pieces come off.
8. Gently insert the pipe cleaner between the two pieces of cardboard.
9. Twist tightly to seal the yarn together.
10. Cut off cardboard.
11. Twist extra pipe cleaner to make ears.
Glittering Galaxy
Complements Astronomy
for Elementary Age

Materials: Black paper; white chalk or gel pen; glue; salt or sand or glitter.
1. Take the black paper and draw stars on it with chalk or a silver or white
gel pen. A parent can do this for a child if the child is unable to draw stars
themselves.
2. Have the child trace the stars with glue.
3. Pour salt, glue, or glitter over the wet glue.
4. Shake the paper over another paper so the extra glitter falls off.
5. Lay flat to dry.
6. Hang up your beautiful glittering skyscape.
DISCUSSION: Talk about different star formations. Check out the legends behind
the stars from sites such as http://www.dustbunny.com/afk/constellations/.
Back to School Bus Craft
Complements The Wheels
on the Bus
 Materials:
Construction paper; Crayons; Scissors; Glue; Tape; Photos of children’s
faces or magazine clippings of faces/dolls; Computer; Printer; Picture of school
bus
Materials:
Construction paper; Crayons; Scissors; Glue; Tape; Photos of children’s
faces or magazine clippings of faces/dolls; Computer; Printer; Picture of school
bus
1. Print out a picture of a school bus (there is a nice one at http://familycrafts.about.com/library/color/blcolbus.htm)
2. Color the school bus.
3. With an adult’s help, cut out the window holes.
4. Place bus on construction paper and trace the windows. Remove bus.
5. Glue children’s faces onto the window hole tracings.
6. Paste the bus onto the construction paper so children’s faces are looking
out the windows.
7. Draw a road or cut out entire bus as desired
World Necklace or Window Display
Complements Baku
the Travel Bug: Making Friends
 Materials:
Wax paper; white glue; food coloring; paint brushes; paper plates to mix glue
on; string or yarn; a photo of Earth.
Materials:
Wax paper; white glue; food coloring; paint brushes; paper plates to mix glue
on; string or yarn; a photo of Earth.
1. Place wax paper on top of the Earth picture.
2. Mix your food coloring into small batches of glue for the colors you desire
(usually, green and blue do well).
3. Spread the glue mixtures on the plastic, covering the areas of land and water.
4. Put your yarn in a glob of glue at the top.
5. Let it dry for a few days.
6. Peel the dried glue off the waxed paper.
7. Hang in a window or wear and enjoy!
Tie-dyed Butterfly
Complements Barbie Fairytopia
 Materials:
large circular coffee filters; washable magic markers; spray bottles filled
with water;"pinch type" clothespins (optional: glue gun, construction
paper or pipe cleaners, and "googly" eyes)
Materials:
large circular coffee filters; washable magic markers; spray bottles filled
with water;"pinch type" clothespins (optional: glue gun, construction
paper or pipe cleaners, and "googly" eyes)
1. Give each child a coffee filter
2. Have the child color on the filter with washable markers.
3. Encourage dots and lots of colors.
4. When they are finished coloring, spray the filters with water and watch the
colors run together.
5. Pinch the middle together so the filter looks like a bow tie
6. Fasten with a clothespin.
7. Cut out antennae from construction paper and glue on to the closed end of
the clothespin or twist pipe cleaners into antennae and attach to the closed
end of the clothespin.
8. Glue on googly eyes if desired.
Measuring Your Journey from Discovery Kids (from http://peepandthebigwideworld.com/activities)
Complements the KIDS FIRST!® store title, “Peep
and the Big Wide World”
 There are lots of ways to measure distance and you can have fun with your child
exploring them.
There are lots of ways to measure distance and you can have fun with your child
exploring them.
1. Before you leave the house or a store, decide how you will measure the distance
to where you are going next. How many streets you pass, how many squares in
the sidewalk, how many steps you take, or how many telephone poles you pass,
are just some examples.
2. If you walk the same way to and from school or a favorite store, on a regular
basis, you can measure the same distance in several different ways.
3. Write down how far you went in streets, squares, steps, poles, or any other
measurement you can think of!
Feast Of Lanterns
By Linda K. Stanek, freelance writer and mom from Ohio
Complements Families of Japan
Each summer, Buddhists in Japan celebrate the holiday of Obon, or The Feast
of Lanterns. Families travel to their mothers’ homes to celebrate this
holiday, believing their ancestors’ spirits make the journey, as well.
They light lanterns at their homes to help the spirits find their way. At the
end of the holiday, people light floating lanterns and release them in the rivers
and streams, creating a beautiful spectacle that is meant to guide the spirits
back to their world. You can create a floating lantern, too.
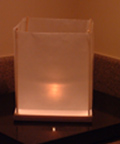 Materials:
Two 6-inch by 6-inch pieces of foam board; one 24-inch piece of waxed paper,
folded lengthwise; four wooden skewers, trimmed to 6 ¾ inches; a glue
gun; one glass votive or small jar; one tea light.
Materials:
Two 6-inch by 6-inch pieces of foam board; one 24-inch piece of waxed paper,
folded lengthwise; four wooden skewers, trimmed to 6 ¾ inches; a glue
gun; one glass votive or small jar; one tea light.
1. Glue the pieces of foam core onto each other to form a base.
2. Poke holes into the 4 corners of the foam board, approximately ¼ inch
from the edge. Insert skewers and secure with glue.
3. If you would like, write a prayer on the waxed paper. (This is a tradition
in Japan).
4. Using glue to adhere it, wrap the paper, prayer inside, around the skewers,
creating a paper "box." Glue the votive to the center of the foam
5. core. (Find the center by drawing an "X" from corner to corner.)
Insert a tea light.
At nightfall, light your lantern and float it on a garden pond, or other body of water where you will be able to retrieve it later. It could also be floated in a child's swimming pool, or even in a large bucket or bowl of water. Remember, never leave a candle unattended!
